Skip to content
Saleculator
Saleculator
  • Features
  • Downloads
  • Docs
  • Pricing
  • Blog
  • Partners
  • Contact

Cashier Guide

HomeCashier Guide

Get Support

Getting Started

  • Introduction
  • Installing Saleculator on Windows
  • Printer setup
  • Performing your first sale!
  • Basic POS Operations
  • Understand Saleculator User Interface
  • Keyboard Shortcuts
  • Building a low cost POS System with Raspberry Pi and Saleculator
  • Activating Saleculator
  • Building a Saleculator Point of Sale System (Linux)
  • Using MySQL for Saleculator
  • Saleculator Webin Introduction

What's New?!

  • Dynamic product labeling and more
  • Updates focusing multi-retail management
  • Introducing a whole new UI
  • Custom POS Reports and more
  • Cash counting while closing
  • Now Print, Email, or Save your reports with a single click! Check the latest update.

Saleculator Features

  • Different Billing Methods or Modes in Saleculator
  • Cash Closing in Saleculator
  • Close cash reports
  • Multiple outlet control from a single point
  • Bill settlement

Tutorials

  • Cashier Guide
  • Manager Guide
  • Administrator Guide

How To's

  • Happy hour sale
  • Edited bills report
  • Printing reports in thermal receipt printer
  • Assign product categories to user roles
  • Printing encoded product cost on label
  • Installing AnyDesk in Saleculator
  • Get quantity from price embedded barcodes
  • Print Open Items in Close Cash Report
  • Update cumulative stock balance in stock diary
  • Using Saleculator for subscription based billing
  • Automatic Billing On Events
  • Printing Expiry Date On Product Labels
  • Dynamic item pricing based on auxiliary item
  • Applying tax on an open item
  • VAT Update Resources for UAE and KSA
  • Apply discount on a selected item
  • Print total amount in words
  • GST Update for India
  • Setting offer to choose any 5 items for the price of 3
  • Buy One Get One Sale
  • Tag-Along items
  • Print accounts report on every 1st of month
  • Show stock of selected item or stop selling out of stock item
  • Change warehouse for current sale
  • Stock movement in close cash report
  • Configure second display with Saleculator
  • Allowing Saleculator to access gmail account for sending mails
  • Setting a shortcut on sales screen to call another screen
  • Updating Saleculator to the latest version
  • Assign dining tables to waiters
  • Payment report based on payment type
  • Dynamic printer or print format selection
  • Tax based on customer
  • Multiple taxes
  • Setting Printer.Ticket for 80 column pre-printed form
  • Get the credit card type
  • How to backup Saleculator data
  • Support for individual person billing sitting in the same table
  • Print Token/Sequence number in receipt & KOT
  • Print total amount in Arabic numerals
  • How to setup KOT Printing
  • How to use auxiliary product as item note or modifier
  • Calculate cash balance in the drawer
  • Printer item wise sales report in close cash report
  • Foreign currency support
  • Print last bill from sales screen
  • Automatically return to billing mode after KOT
  • Embedding Chrome browser in Saleculator POS
  • HO to Branch Sale
  • Print priority notification on KOT
  • Restrict KOT cancellation
  • Calculating quantity from amount
  • Price/Weight/Quantity embedded barcode configuration
  • Installing Saleculator Webin on Windows
  • How To Bulk load data using Saleculator Webin
  • Laundry Operations With Saleculator POS
  • Handling Customer Debts Using Saleculator Software
  • Assigning USB printer to LPT port in Windows
  • Using Saleculator for Salon Business
  • Setting Static IP for the Raspberry LAN connection
  • Reset Saleculator from Root Shell
  • How to setup receipt and KOT on the same printer
  • Adding Taxes to the bill receipt
  • Printing Receipt with KOT
  • How to print duplicate receipt copy
  • Remote access WEBIN and Putty
  • Deleting Products and Categories from Saleculator POS Menu
  • How to restore a backup from the raspberry root using a flash drive
  • Adding service charge button and resource
  • Adding Menu Search option on the sales screen
  • Printing receipts on A4 & A5 printer sheets
  • Adding shortcut buttons for Cash, Card and Debt payment modes
  • Downloading PLU file for Label Scale
  • Transaction cutting above certain amount limits
  • Retrieve The License Key from the Root
  • Protected: PIN Reset
  • Installing Saleculator on Android Tab/Phone
  • Manual Update of Date and Time from Raspberry root
  • Print Barcode Label using WEBIN
  • How to enable the buzzer sound (Beep) for your KOT printers
  • Create User Roles as per your needs and permissions (E.g, Create a Role for sending KOT only!)
  • Change product button size
  • Billing transaction for Advance payment customers
  • IMPORTANT! Close cash report changed in version 3.8 U2 onwards
  • Adding new reports in Close Cash report
  • Accepting advance payment
  • How to setup Saleculator Kitchen Display System – KDS
  • Automatic data backup
  • Delete transactional data older than given days
  • Customize product button font style
  • Payment report based on card service provider
  • Setting customer reward points
  • Printing discount amount/service charge below the total amount in the receipt
  • Updating Webin to the latest version
  • Category wise sales report with parent category and profit
  • How to print barcode labels from Saleculator
  • Print category wise sales report in Close Cash
  • Print receipt log in Close Cash report
  • Setting a default tariff for all new bills
  • Apply a discount or tariff based on customer category
  • Round Off the total bill amount
  • Discount on total bill amount
  • Printing a coupon along with the receipt
  • Capture additional information and store in receipt
  • Capture additional information about an item from sales screen
  • Setting product property
  • Adding ZATCA Approved QR code to the invoice
  • Adding a payment option for Tip collection
  • Print Arabic product names on the receipts
  • How to delete the pictures from all product buttons
  • How to add Onscreen Keyboard for Saleculator on Raspberry Pi
  • Adding UPI enabled Payment QR code on the Bill Receipt
  • Access Raspberry Root using only LAN cable and Putty App (Without Internet)
  • MySQL command to Update Tax to all the products on the catalog automatically
  • Connect your Raspberry to the WiFi network
  • How to setup KOT4 for additional printer
  • Setting Up the Server and Client (Windows)

Hardware Setup

  • Setting-up Network thermal printer
  • Connect a network thermal printer directly with Saleculator
  • Setup HP or Samsung Laser/Deskjet Printers
  • A4 Laser printer setup for reports
  • Using Bluetooth weighing scale with Saleculator on Raspberry Pi
  • Using Label Scale with Saleculator

Troubleshooting

  • Fixing Database Not Loading error in Saleculator M5
  • Fixing issue, which required double tapping on touch screen to get click working
  • Protecting Saleculator Database from Ransomware Attacks
  • Enabling Tapping To Click for touchpads
  • Installing WiFi adpaters
  • Enabling support for more than 4 serial devices
  • Switch screen mode from portrait to landscape
  • Running remote Saleculator in Windows using Putty
  • Recover data from ibdata and .frm files
  • Resources supporting 42 character printer
  • Disable Saleculator screen turning blank due to inactivity
  • Persistent names for usb and serial devices
  • A quick rescue to free space when mysql run out of space
  • Remove duplicate item entry in sales screen
  • Recover data from a crashed MySQL instance
  • Using Putty to remote access Saleculator command shell
  • Updating Saleculator SSL certificates manually in JAVA keystore
  • Fixing issue of CUPS pausing the printer
  • How to solve repeated activation key requests?
  • MySQL Warning: IP address ‘192.168.1.98’ could not be resolved: Name or service not known
  • How to fix if Saleculator is stuck on loading screen
  • Installing eGalax touchscreen driver on Linux
  • Saleculator stuck at command shell
  • Fixing “Not enough stock” error when billing products
  • How to fix no network connection issues while activating the license key
  • Delete transactions for heavy back-office data
  • Fixing “This product does not have attributes” error!
  • How to resolve “Danger: Cannot connect to database. Database not available” error on Windows
  • Corrupted/Damaged SD Card issues
  • Fixing Arabic language issue on the barcode label printout
  • How to reset the negative inventory unit values to zero
  • How to fix the disordered sequence of Ticket# in the sales log report
  • Fixing “mysqld.exe System Error” while installing MySQL on Windows
  • Fixing error “The entity name must immediately follow the ‘&’ in the entity reference.”
  • Fix issue of monitor turning blank while Saleculator loading
  • Solving common disk errors
  • Find tag ending issues in XML resources
  • Fixing “There is no stock of this item” error when trying to refund an item.
  • Data backup using command prompt (Windows)

Reference

  • Objects and Methods
  • Home
  • Documentation
  • Tutorials

Cashier Guide

This article will teach how to perform operations under Cashier Role

Calculation and execution of the bill

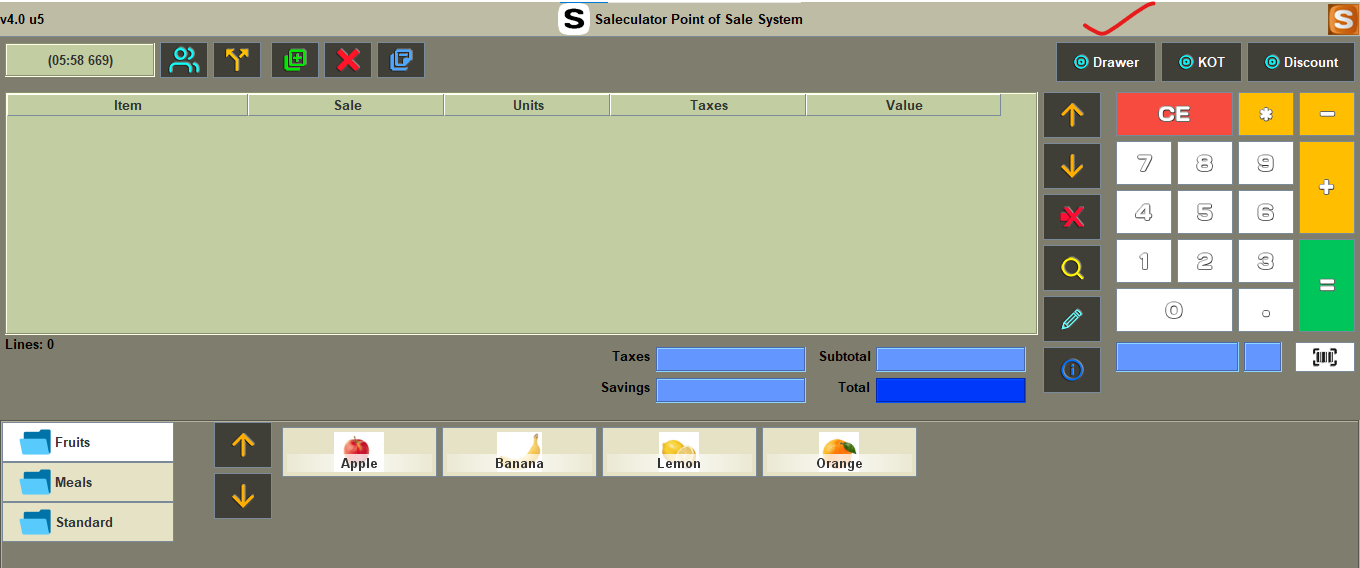
Add items to the bill > Press > Press

Note: Whether you are operating in Standard, Restaurant or Delivery mode, the sales screen looks the same except for some buttons. All the sales operations are done in the Sales screen.

Adding and searching an Item on a bill

  1. Add an item from the barcode scanner/typing barcode from catalog.
  2. Adding an open item:
    If an item is not present in the catalog, and still you want to add it to the bill, it is an open item. To add an open item to the bill, follow the below steps:

Enter price of the item > Press

  1. Searching item:
    Product Search button > Enter product parameters > Execute Filter button > Select the item from the result > OK


Removing items from bill

Choose any one method below:

1. Press –(Minus/Hyphen), if the item quantity is 1
2. Press the Delete Line icon
3. Press “Alt + Del” on keyboard


Updating the quantity of items in a bill

Choose any one method below:

1. Press + to increase quantity by 1 / Press – to decrease quantity by 1
2. Press * key > quantity > “+”
3. Edit Line button > Units.

To make changes to a line item’s quantity or price 
Click Edit Line button > Change the units > OK
Click Edit Line button > Change the price > OK


Changing selling price

Select the item by pressing it > Press * key > press price > press –
E.g. *12.5- sets the item price to 12.50 Or
Select the item by pressing it > Press Edit Line button > enter price


Changing tariff 

On top of the Sales screen, choose the tariff from the Tariff drop down

Note: Tariff drop down is visible only if tariffs are configured.


Applying discount

Press the Discount button > Enter the discount amount or discount percentage > OK.

E.g. Enter 10 for a discount of 10.00. Enter 10% for a discount of 10% of the total amount.
Or
To make the total bill for free for special customers go to
Payment screen > payment method “Free” > OK


Adding existing customer

Select Customer button > Search the customer using search key, name or address > Select the customer and press OK
Or
Scan the customer loyalty card
Or
Press C > Customer Code > Scan button/Enter key


Adding new customer

Press the Select Customer button > Type Search Key and Name > Type Address (optional) > Save > OK


Changing/removing customer from bill

Select Customer button > Search the customer using search key, name or address
> Select the customer and press OK
Or
Scan the customer loyalty card
Or
Press C > Customer Code > Scan button/Enter key

To remove customer
Customer button > Press Reset button > Press OK

Holding and recalling a bill

Used when a transaction is interrupted, you can put it on hold, and then recall it when you’re ready to complete. Not available in Restaurant and Delivery mode as the transaction is attached to a table or a call.

Press New Bill button to hold a transaction
Press Bill Queue button to recall a transaction


Splitting a bill

Split Bill button > Select item from the left side > Right Arrow with stopper to move quantity of item to the new bill > Right arrow to move single quantity of item to the new bill > Repeat for all the items to be split > OK.


Accepting payment

Press “=” > Payment method > Given amount > Balance shown in the Change field > OK. 

Note: If you want to accept payment without printing receipt, release the Printer button by pressing it.


Multiple payment update

Press “=” > Payment method > Enter the amount and press “+” > Repeat 2nd & 3rd steps for all payment methods until the total given is equal or more than bill total > OK.


Cancelling a bill

Press the Delete button > OK.

Note: In restaurant mode, if items are sent to the kitchen, you may have to send cancellation KOT to the kitchen to delete the bill.


Opening and closing

Specify an opening cash amount, under Payments>Cash In, so that system can track how much money is added to the cash drawer from the start of the current sequence. Close cash allows you to close the sales of the current sequence and prints/emails a report for the day’s sales and other transactions. Close cash is done at the end of the day or at each shift change. After each Close cash, the system automatically starts a new sequence and resets the cash drawer amount to zero.

Printing partial cash report

Partial cash printing allows taking a report for the day’s sales without closing the cash.

Main Menu > Close Cash > Press Print button

Note: If you don’t see a Print button, you are in blind closing mode. You cannot print a partial cash report under blind closing mode.

Close cash

Main Menu > Close Cash > Press Close Cash button

Note: Apart from printing the report, after closing the cash, an email is sent to the configured address.


Making payments other than usual bills

Cash In:

Main Menu > Payments > Cash In button > Enter the Total amount > Enter Notes (optional) > Press the Save button on toolbar.

Cash Out:

Main Menu > Payments > Cash Out button > Enter the Total amount > Enter Notes (optional) > Press the Save button on toolbar.

Customer debt payment:

Main Menu > Payments > Customer button > Select Customer button > Enter Search key/Name/Address (optional) > Execute filter button > Select the customer from the result list and press OK > Pay Debt button > Enter amount paid > OK.

Supplier credit payment:

Main Menu > Payments > Supplier button > Select Supplier button > Enter Search key/Name (optional) > Execute filter button > Select the supplier from the result list and press OK > Pay Credit button > Enter amount paid > OK.


Opening the cash drawer

Press the Drawer button on top right side of the sales screen


Searching and reprinting an existing receipt

Main Menu > Edit Sales > Enter search parameters (optional) > Execute Filter button > Select the bill from the result list > OK.

Main Menu > Edit Sales > Enter receipt number > Tick button/Enter key/scan the receipt barcode > Print button on top Doing a bill without printing receipt.


Returning item with receipt

Main Menu > Edit Sales > Enter receipt number > Tick button/Enter key/scan the receipt barcode > Refund button > Select returning item from the list below/scan the item barcode and press one of the refund buttons: (Refund One: Return a single quantity of the item selected or Refund Line: Return the selected item or Refund All: Return all items) > “=” button > payment method > OK.


Changing PIN

System Menu > Change PIN > Enter current PIN > OK > Enter new PIN > OK > Enter new PIN again > OK.

What are your Feelings
Share This Article :
  • Facebook
  • Twitter
  • LinkedIn
  • Pinterest
Still stuck? How can we help?

How can we help?

Updated on February 18, 2021
Manager Guide
Saleculator

Primary Pages

  • Home
  • About
  • Contact
  • Service

Pages

  • About
  • Pricing
  • Contact
  • Request for Demo

Template

  • Blog
  • Service
  • Downloads
  • Contact

Copyright © 2022 | Saleculator